Introduction
When I started exploring Microsoft Copilot Studio, one of the first challenges was not building an agent. It was understanding how the licensing and billing model worked.
I initially had a Microsoft Copilot Studio trial in my tenant. That was useful for getting started, but a trial is temporary. I wanted a learning environment where I could continue building agents, testing configurations, and publishing projects without immediately committing to prepaid monthly Copilot Studio capacity.
That is where Pay-As-You-Go, or PAYG, became useful. With PAYG, a Power Platform environment can be linked to an Azure subscription, and eligible Copilot Studio consumption can be billed through Azure using Copilot Credits.
For a learner, lab environment, or proof of concept where usage is expected to be low, PAYG can provide a flexible way to continue working with Copilot Studio while keeping billing visible in Azure.
Microsoft licensing can change over time. Always confirm the latest Copilot Studio billing and licensing details from Microsoft Learn before applying this in a production tenant.
Why I Needed PAYG for Copilot Studio
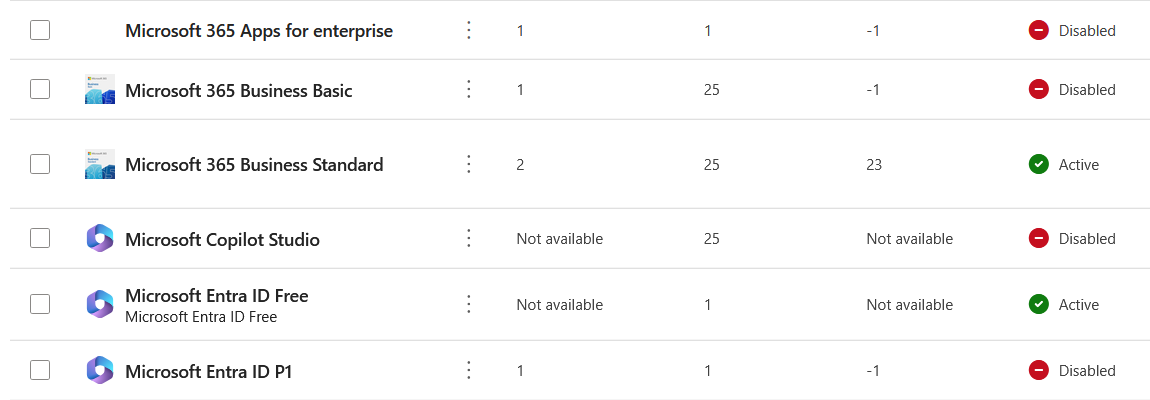
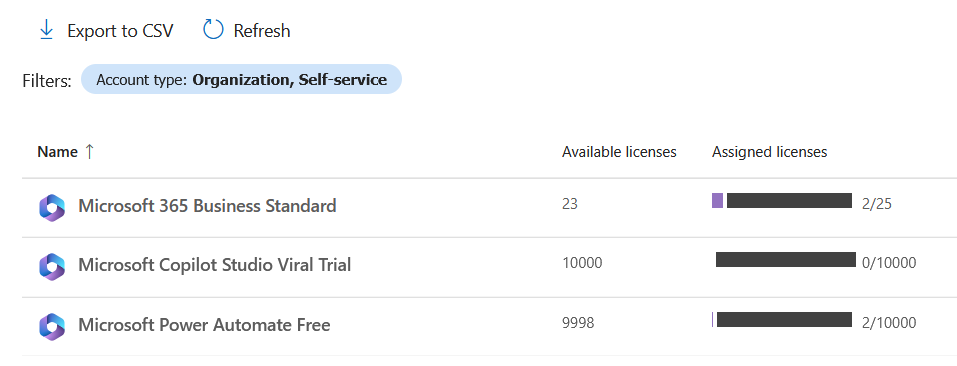
Before configuring PAYG, I checked the subscriptions and licenses available in my Microsoft 365 tenant. My previous Copilot Studio subscription had expired, while Microsoft 365 Business Standard remained active.
I could also see the Microsoft Copilot Studio Viral Trial under Microsoft 365 licensing. The important lesson was that a viral trial is not the same thing as long-term Copilot Studio capacity. It is a temporary entitlement that can help with early testing, but it should not be confused with a sustainable billing model.
My goal was to move away from depending on the trial and configure a cleaner learning setup:
- Use Azure for PAYG billing.
- Use a dedicated Power Platform environment for Copilot Studio work.
- Authorize makers through a clear security group.
- Validate that Copilot Studio still worked after removing trial dependency.
Understanding the Licensing Model
The mental model that made Copilot Studio licensing easier for me was separating author access from consumption billing.
Author access determines who is allowed to create and manage agents. Consumption billing determines how Copilot Credit usage is paid for.
In this setup, users are added to a Copilot Studio authors security group. That group authorizes maker access in Power Platform tenant settings. The Copilot Studio agents live inside a Power Platform environment, and that environment is connected to a PAYG billing plan linked to an Azure subscription.
The simplified flow looks like this:
User -> Copilot Studio Authors Security Group -> Power Platform Environment -> PAYG Billing Plan -> Azure Subscription -> Copilot Credit Consumption
Step-by-Step Configuration
The following steps show how I configured PAYG for my EasyLearn365 Copilot Studio learning environment.
Step 1: Verify the Azure Subscription
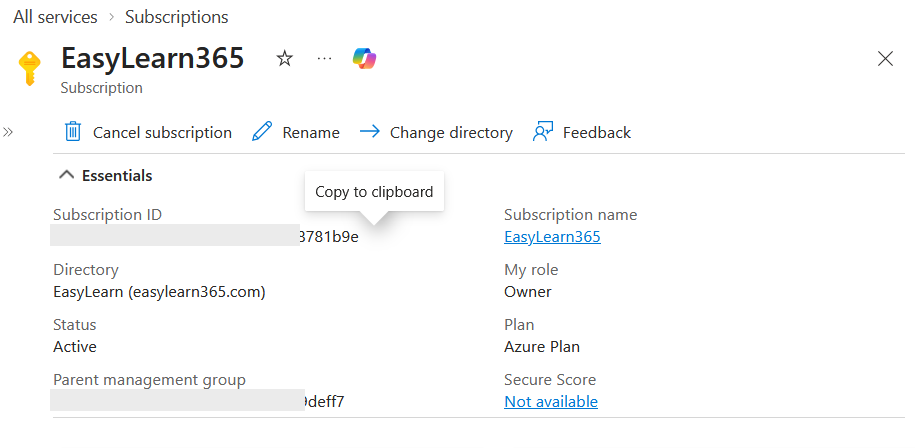
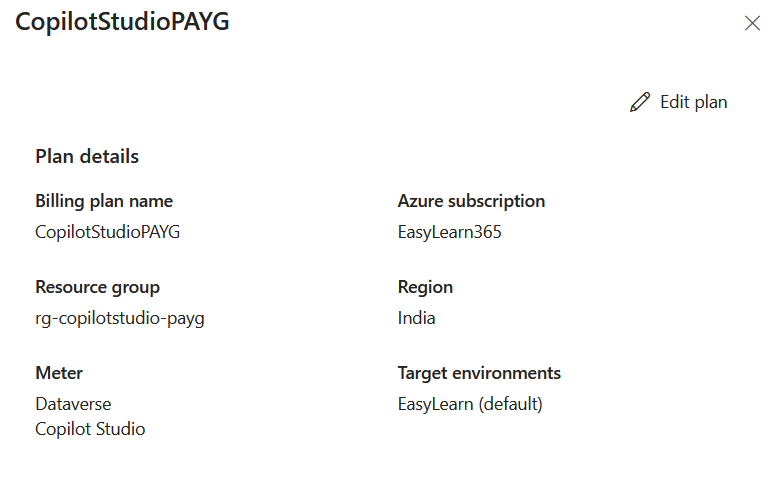
Open the Azure portal and go to Subscriptions. Confirm that the subscription you want to use for PAYG billing is active and that you have sufficient permissions. In my lab, the EasyLearn365 subscription was active and my account had the Owner role.
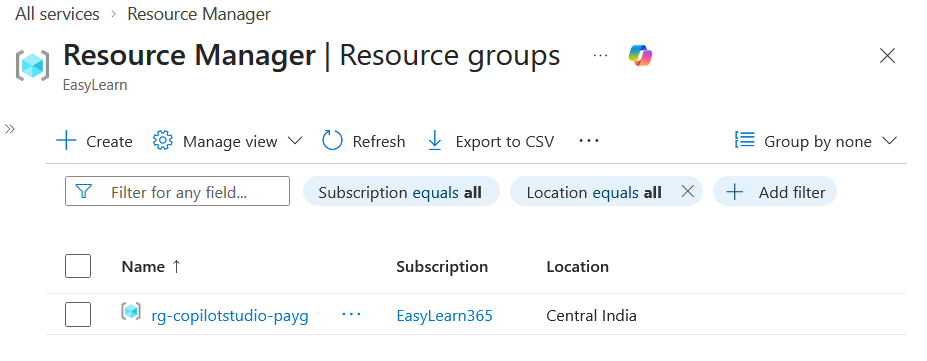
Step 2: Create a Dedicated Resource Group
In Azure, open Resource groups and create a dedicated resource group for the PAYG configuration. This keeps billing-related resources easier to identify and manage.
For this lab, I used rg-copilotstudio-payg in the Central India region.
Step 3: Open Power Platform Licensing
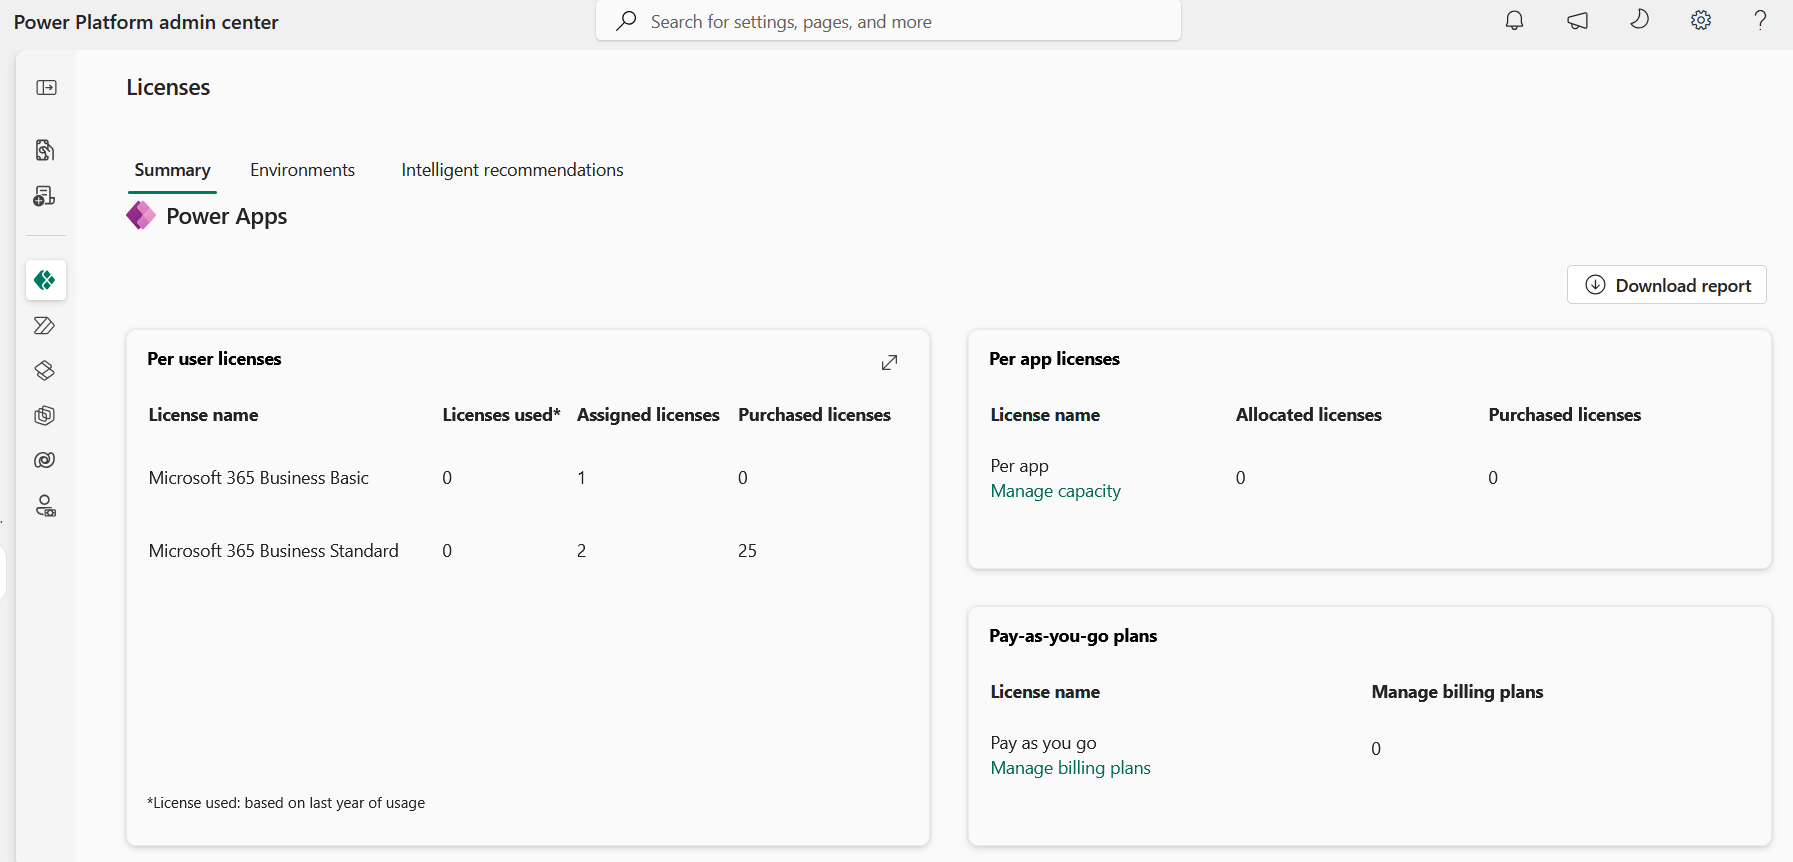
Open the Power Platform Admin Center and go to Licensing. Review the summary page and scroll to the Pay-as-you-go section. Before configuration, my tenant showed no PAYG plans.
Step 4: Create a New Billing Plan
From the Pay-as-you-go section, select Manage billing plans, then create a new billing plan. Use a clear name and select the Azure subscription and resource group created for this purpose.
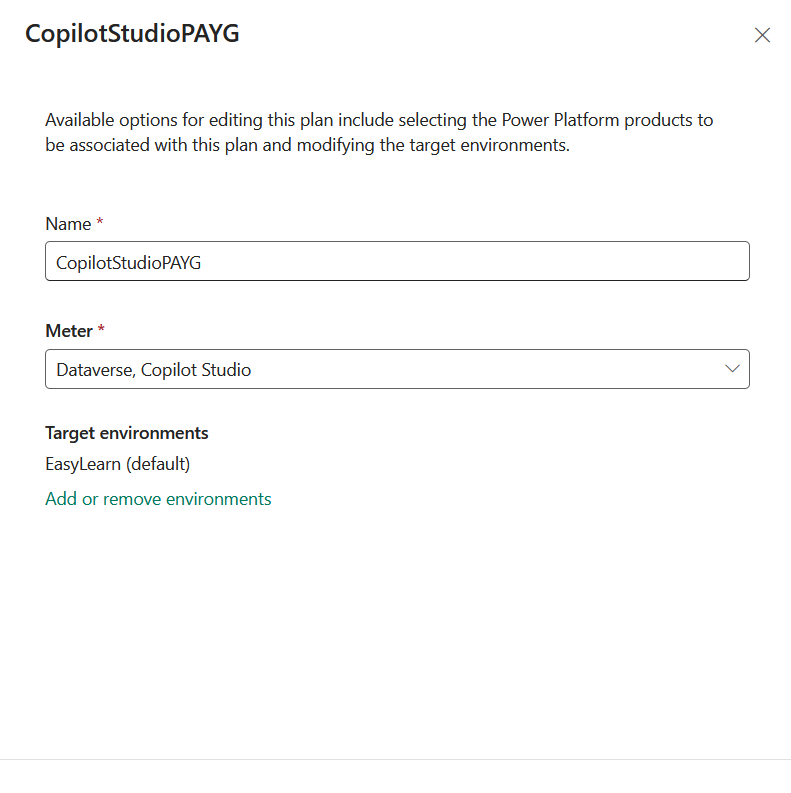
For this lab, I used CopilotStudioPAYG as the billing plan name.
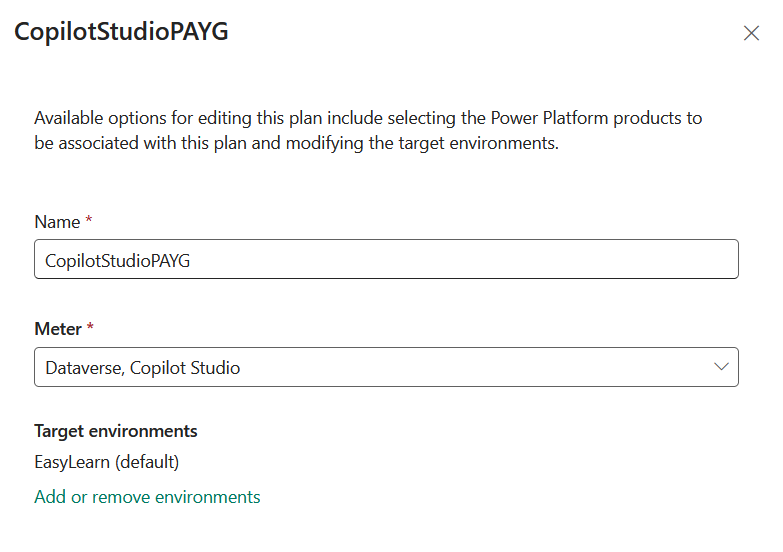
Step 5: Enable the Copilot Studio Meter
During billing plan setup, verify the selected meters. Dataverse may be included automatically, but for this scenario the Copilot Studio meter must also be selected.
Leave unrelated meters unchecked unless you intentionally want PAYG enabled for those services too.
Step 6: Select the Target Environment
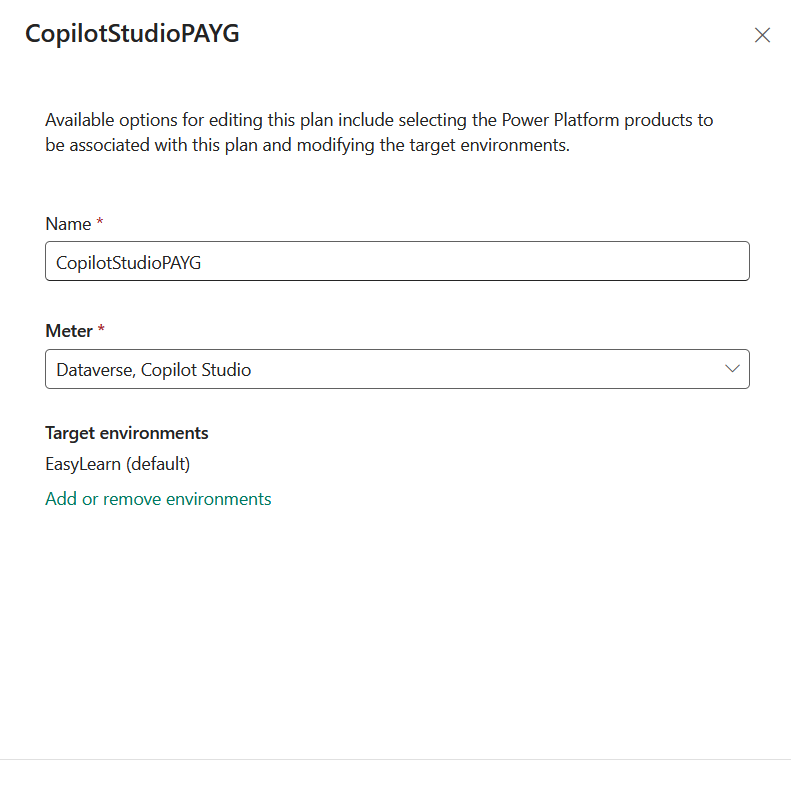
Choose the Power Platform environment that will host the Copilot Studio agents whose usage should be billed through this plan. PAYG is environment-scoped, so verify that your agents are created in the same environment that is attached to the billing plan.
In this lab, I selected EasyLearn (default) instead of the Microsoft Teams environment.
Step 7: Provision and Verify the Billing Plan
Complete the wizard and allow Power Platform to provision the billing plan. After provisioning, confirm that the plan is enabled and linked to the correct Azure subscription.
Step 8: Confirm PAYG Copilot Credits Are Visible
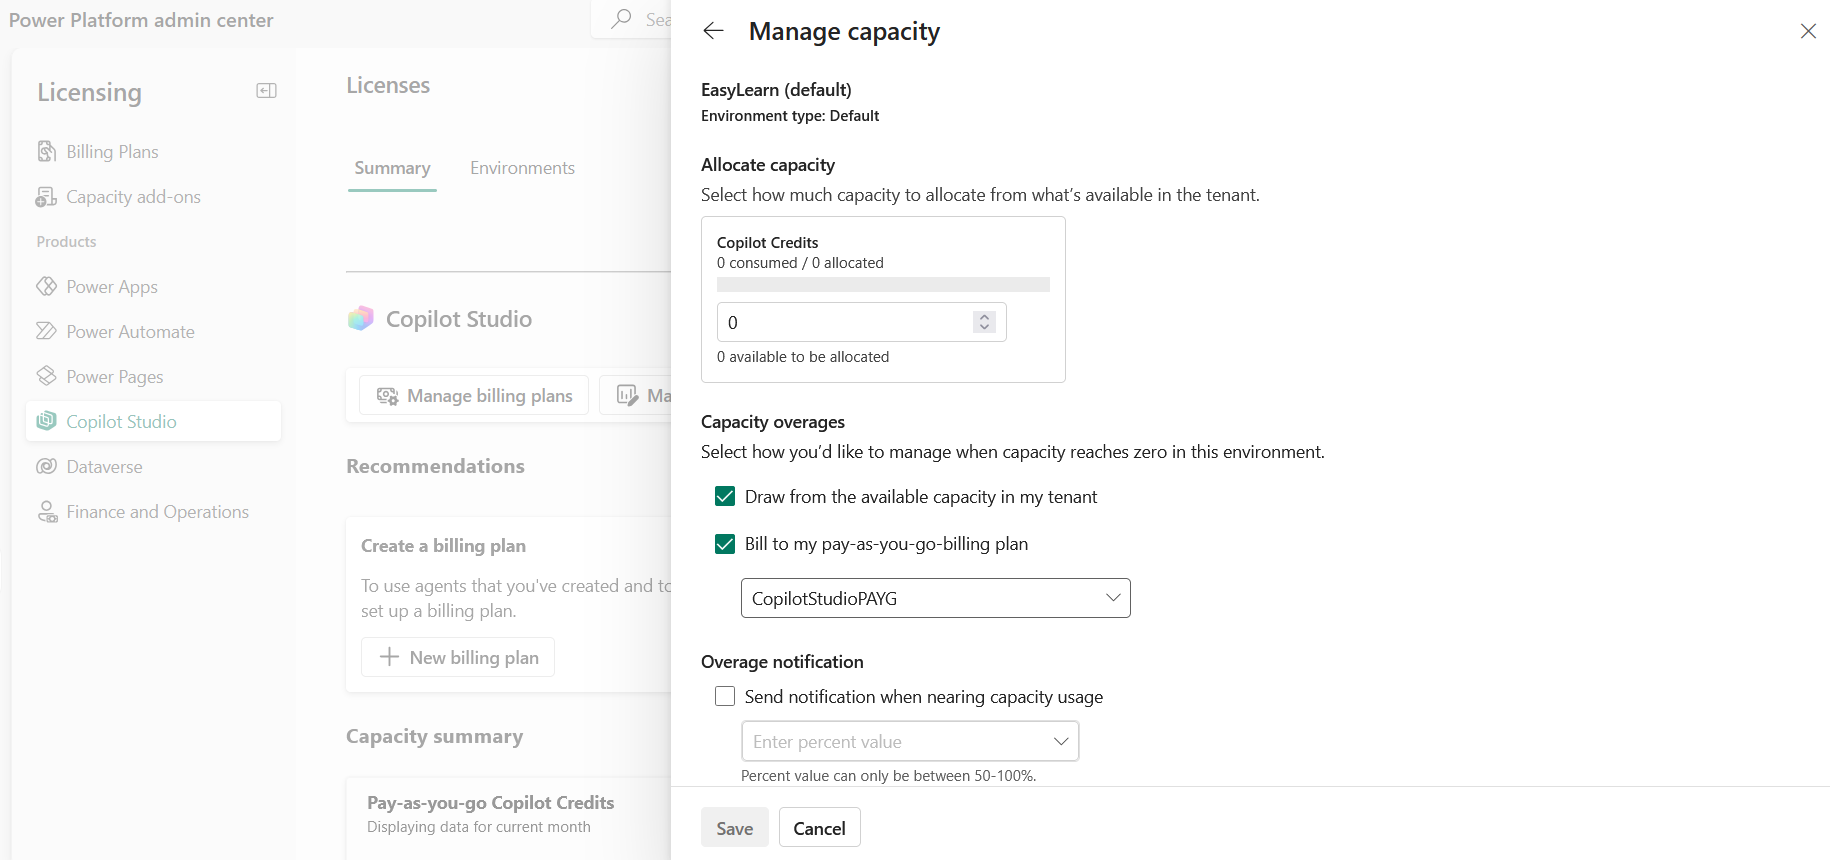
In Power Platform Admin Center, open Licensing > Copilot Studio. Confirm that Pay-as-you-go Copilot Credits are visible after the PAYG plan has been configured.
Step 9: Configure Copilot Studio Authors
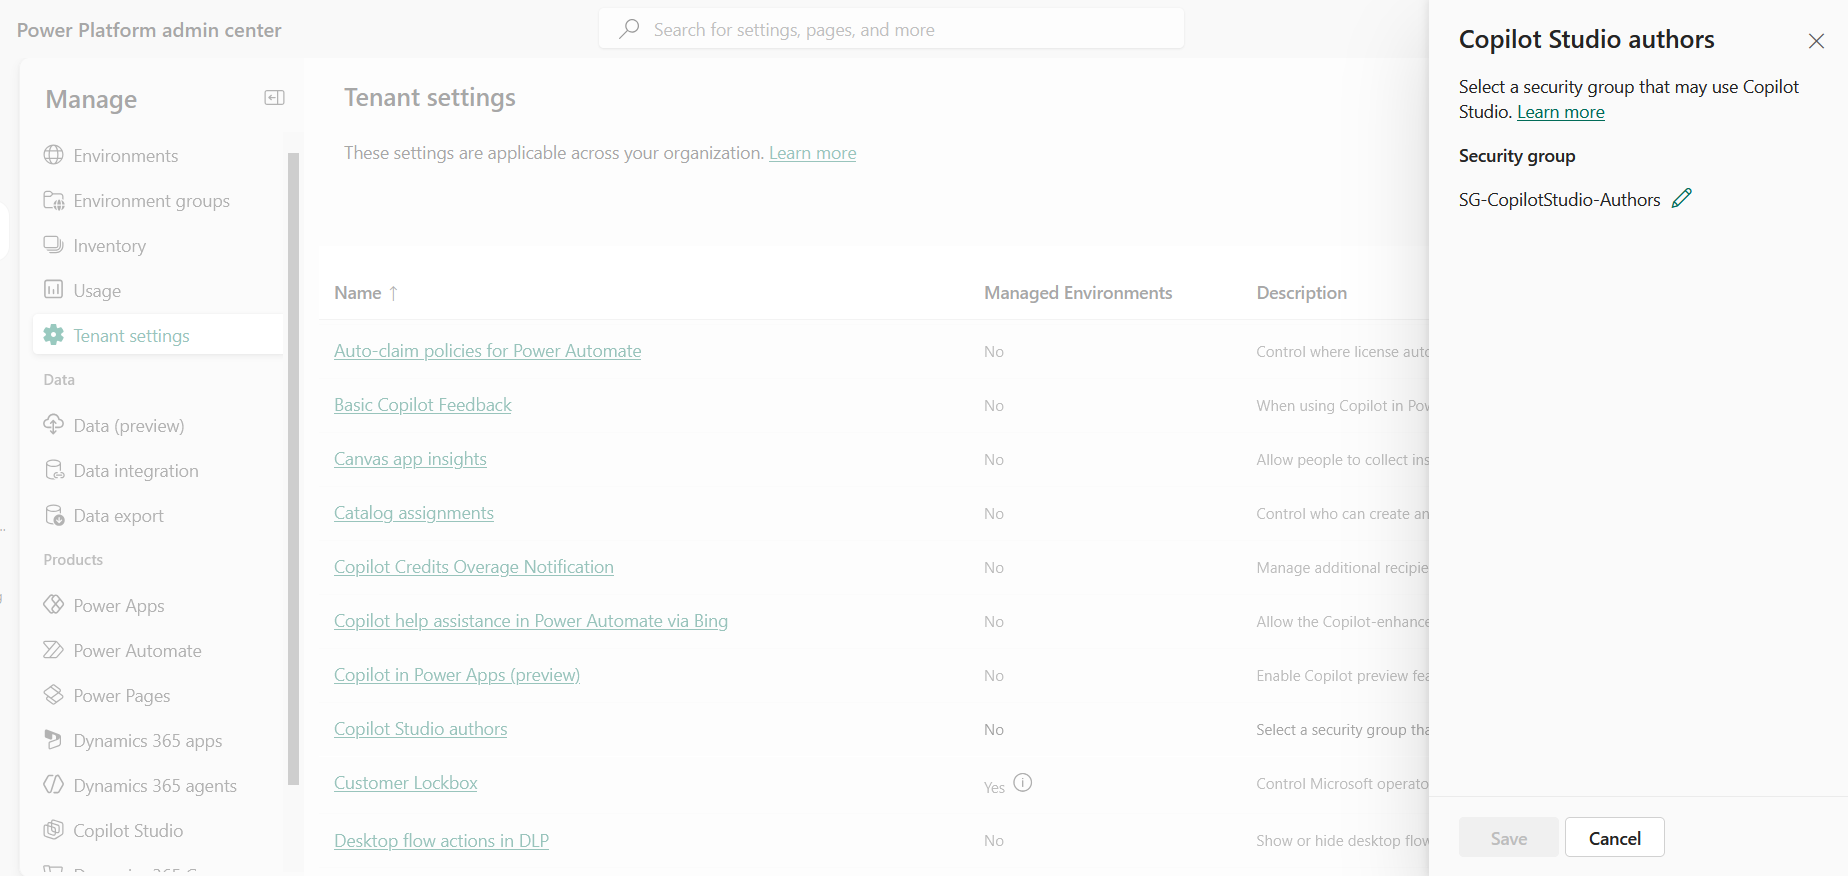
Open Power Platform Admin Center > Settings > Tenant settings > Copilot Studio authors. This setting can be used to authorize Copilot Studio makers in a PAYG scenario.
Step 10: Create an Entra ID Security Group
Open Microsoft Entra Admin Center and create a dedicated security group with assigned membership. Add the users who should be allowed to create and manage Copilot Studio agents.
For this lab, I used SG-CopilotStudio-Authors.
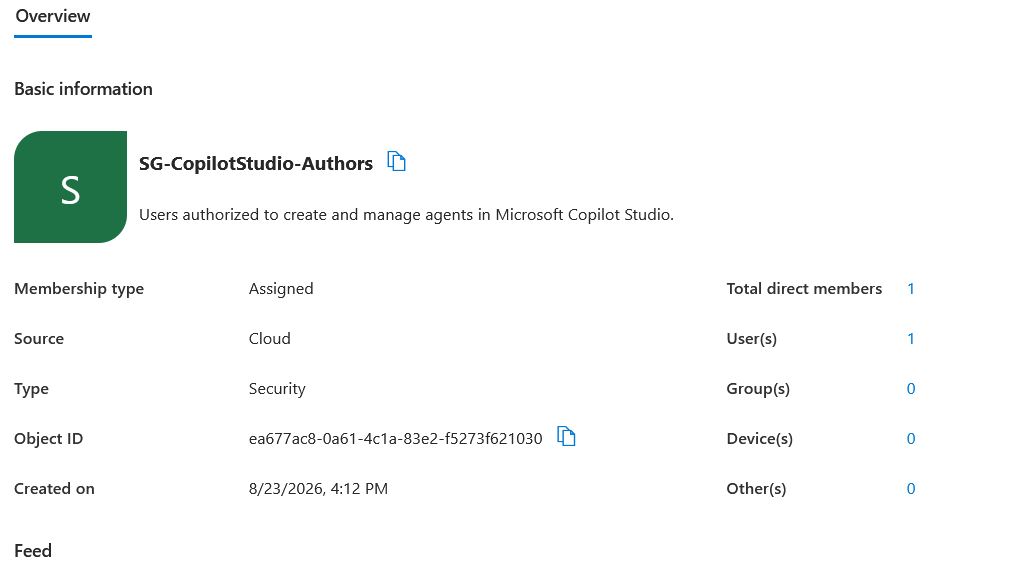
Step 11: Assign the Security Group and Validate Copilot Studio
Return to the Copilot Studio authors tenant setting and assign the dedicated security group. Then open Microsoft Copilot Studio, confirm that the selected environment is the PAYG-enabled environment, and verify that you can open existing agents, create new agents, and access publishing functionality.
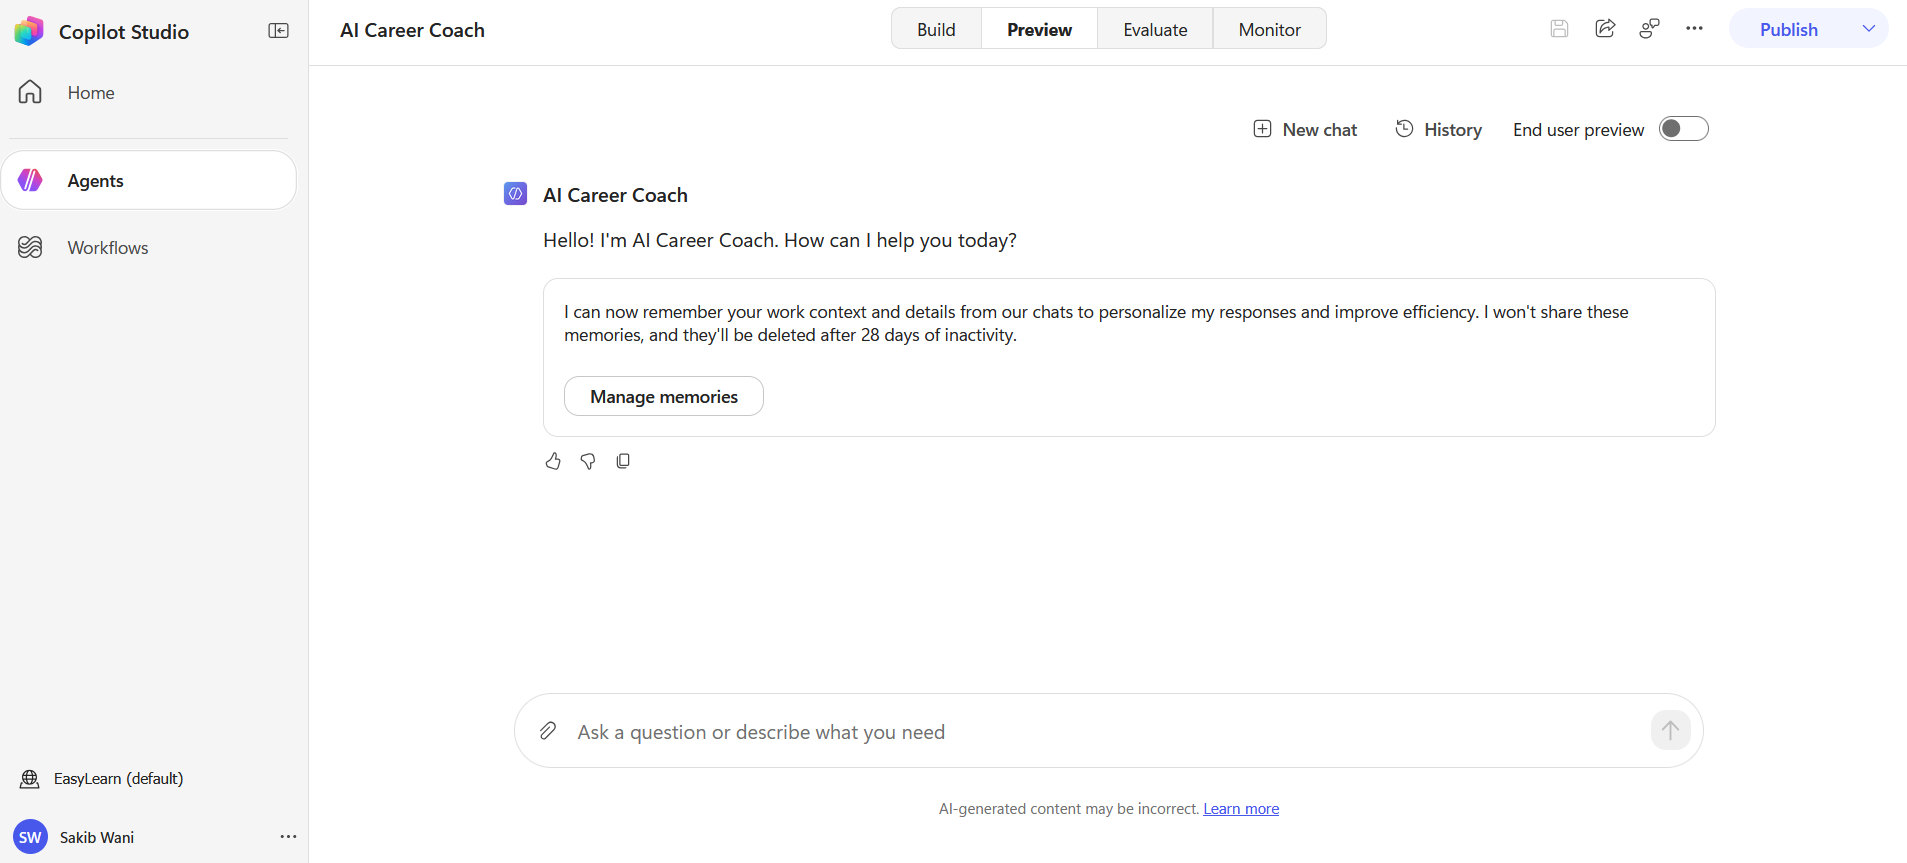
Step 12: Remove the Viral Trial After Validation
After PAYG is configured, the Copilot Studio authors security group is assigned, and Copilot Studio access is working, remove the Microsoft Copilot Studio Viral Trial from the account if it is no longer needed.
Sign out and back into Copilot Studio, then validate that agents are still accessible and publishing still works. This confirms that the setup is no longer dependent on the trial entitlement.
Validation, Cost Monitoring, and Cleanup
Once PAYG is enabled, the most important validation point is making sure the right environment is attached to the right billing plan. If your agent is created in a different environment, it may not use the billing setup you intended.
PAYG removes the upfront prepaid capacity commitment, but it does not mean unlimited free development. Usage that consumes Copilot Credits can generate Azure charges.
Activities that can contribute to consumption include:
- User interactions with agents
- Generative responses
- Knowledge retrieval
- Agent actions and tools
- Autonomous execution
- Certain testing and evaluation activities
For a lab environment, I recommend configuring a conservative Azure budget and alerts. For example, you could start with a small monthly budget and alerts at 50%, 80%, and 100% so unexpected usage is noticed early.
Key Takeaways
- Copilot Studio PAYG can be used with an Azure subscription instead of starting with prepaid capacity.
- PAYG is configured at the Power Platform environment level.
- The billing plan connects the Power Platform environment to an Azure subscription and resource group.
- The Copilot Studio meter must be selected for this scenario.
- Maker access can be controlled through the Copilot Studio authors tenant setting and an Entra ID security group.
- The Copilot Studio Viral Trial is separate from long-term consumption billing.
- PAYG is flexible, but usage should still be monitored with Azure Cost Management and budgets.
Closing Thoughts
Licensing was one of the areas that initially made Copilot Studio feel more complicated than it needed to be.
Once I separated author access, environment selection, consumption, and billing, the architecture became much clearer.
For the EasyLearn365 learning environment, PAYG gives me a practical way to keep building real Copilot Studio agents, experiment with features, publish projects, and learn at my own pace without beginning with a large prepaid capacity commitment.
The objective of EasyLearn365 is not only to show the final working configuration. It is to document the questions, confusion, configuration decisions, testing, and lessons that happen while building something for real.
Learn -> Document -> Build -> Improve